What is Brevo Automation & How to Use it for Marketing?
Automation has a key role in email marketing. I named it “Smart Email Engine,” and it helped me a lot in my email marketing journey. Today, I wrote about what automation is and how to use Brevo automation for e-commerce. Let’s get into it.
What is Automation in Marketing and Why Is It Important?
Automation in marketing means your system does the boring work for you. You set rules once. The system follows them every day. It sends emails, tags customers, shows offers, and moves people into the right place in your sales journey. You save time. You stay consistent. You focus on growth, not manual tasks.
I love this idea because I used to send emails one by one. I felt tired and slow. The moment I tried automation, I said, “Why did I not do this earlier?”
Let me explain in a simple way.
Imagine you run an online store. A new visitor joins your email list. You do not wait and think, “Should I send them a welcome email now or later?” Your automation welcomes them right away. It says hello, shares a discount and gives value. It keeps the person warm until they buy.
Another example. Someone buys a product. Automation says thank you. It suggests a related item. It checks if they open your emails. If they ignore you, it tries again gently. It keeps the relationship alive.
How to Configure Automation with Brevo?
Now, without further ado, let’s jump into the main topic, which is how to use Brevo automation for your email marketing. So here is the complete step-by-step guide.
1) Set Up Your First Automation with Brevo
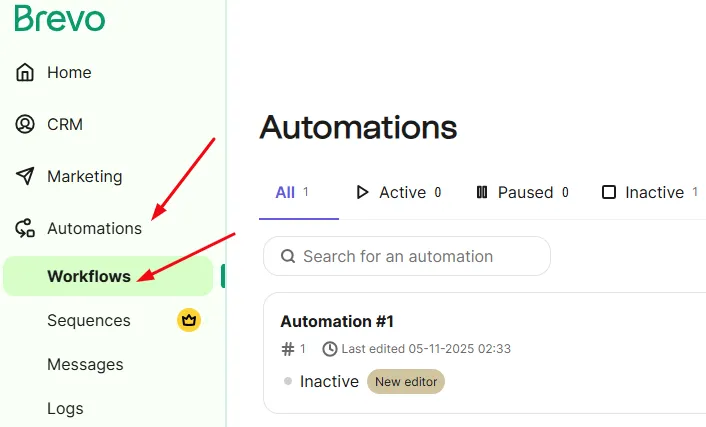
Sign in to your Brevo account and look for “Automations” on your left sidebar. Open this and now choose “Workflows”.
Now, click on the “Create an automation” button to start the process. From here, you will get two options. Either you can choose the pre-built automation, or you can go with a personal or customized one.
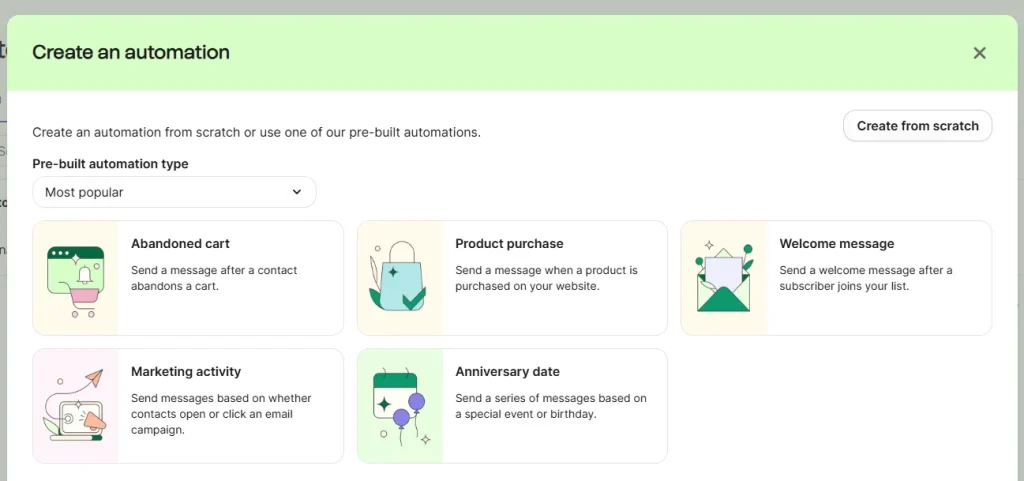
Since it is your first automation, I suggest you choose a simple and easy automation, like:
Sending a welcome email or sending a thank you email.
2) Setting Up the Automation Tasks and Triggers
First, decide what actions you want from your users. Then build your automation around those actions.
Think step by step. What do you want a new subscriber to do? What do you want a buyer to do after checkout? Once you know that, things become easy.
For example, you can set a rule for these moments:
- When someone joins your email list
- When a visitor views a product
- When a customer leaves their cart
- When a person buys something
- When someone does not open your emails for a while
Now you create the flow. Welcome them. Send an offer. Remind them about the abandoned cart. Say thanks after a purchase. Suggest the next product. Check engagement. And so on.
3) Activate Your Brevo Automation
Activate your automation workflow and check whether it is working or not. Test it manually and find out if anything is missing. If everything is working fine, then your users will start getting emails from your automation process.
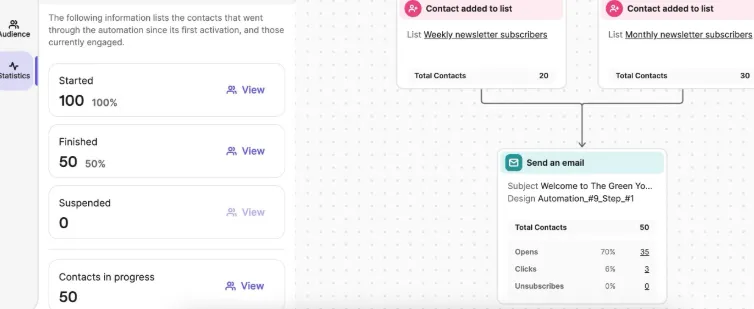
4) Check the Progress and Stats
At the end, you must check how your automation performs. Do not just set it and forget it. Look at your open rates, click rates, and sales. See how people react. Notice which emails work well and which ones feel weak.
If you see low openings, try a fresh subject line. If people do not click your links, test a shorter message or a clearer offer. Little tweaks can bring big results. I do this often, and honestly, it feels nice when a small change boosts conversions.