How to Sign Up for a Brevo Account?
I first used Brevo in late 2022 for one of my clients’ projects. It was the time I decided to use this tool for all of my projects. Brevo is a complete package for those who are looking for a marketing suite with an affordable pricing tag. However, if you want to give Brevo a go, then you need to register for an account first.
For your ease and assistance, I have prepared a guide for all the beginners and advanced-level marketers about how to sign up for Brevo. This guide includes all the basics and tips that you will need with Brevo.
Why Should You Choose Brevo for Email or CRM?
Brevo has been in the market since 2012, when it was named “Sendinblue”. The tool is purely cloud-based and has AI systems as well to optimize the results. Also, it has a built-in CRM tool that works precisely.
However, if you are thinking whether you should use this tool or not, then here are some features that will help you to make the right decision.
Free Plan Forever
Brevo offers a free plan forever. So if you are worried about whether you should invest or not, then try the Brevo free account and then make a final decision. You don’t need to add credit card details to get this free account.
Also, with Brevo’s free plan, you can send up to 300 emails per day and 9000 per month. So it is a good idea to test and use the tool before you pay for the service.
Drag and Drop Email Editor
So you are a beginner and have no idea about how to customize emails? Right? Then no need to worry. Brevo has a drag-and-drop editor where you can make emails stylish and appealing with visuals in one go.
CRM
If you are running a business with sales, then Brevo is a good choice. It provides a sales CRM that provides a detailed overview and stats of sales. You can automate tasks depending on the user’s behaviors and occasions. The CRM tool is all free to use as well.
Automation With Respect to Users’ Behavior
Brevo offers an intelligent automation tool that tracks the behavior of users and then automates the campaigns or transactional emails with respect to them. This makes it a perfect tool for increasing sales and interactions.
Brevo Account Registration – Step-By-Step Guide for Beginners
Let’s create your Brevo account and then use it as your marketing tool. I have explained an easy step-by-step guide for all the new and beginner users. Follow the steps and register your account today.
1) Go to Brevo.com:
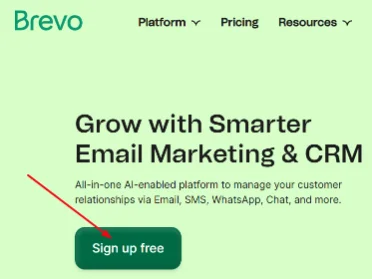
Brevo.com is the official website of Brevo, where you can start your registration process. This process will take only 5 minutes in total. Once you open the official Brevo website, you will see a green button with the text “Sign Up Free”. Just click on this button.
2) Enter Your Email:
On the next page, you will see the title “Create your account. No credit card needed”. Below this, you will have three options to provide your email. You can go with:
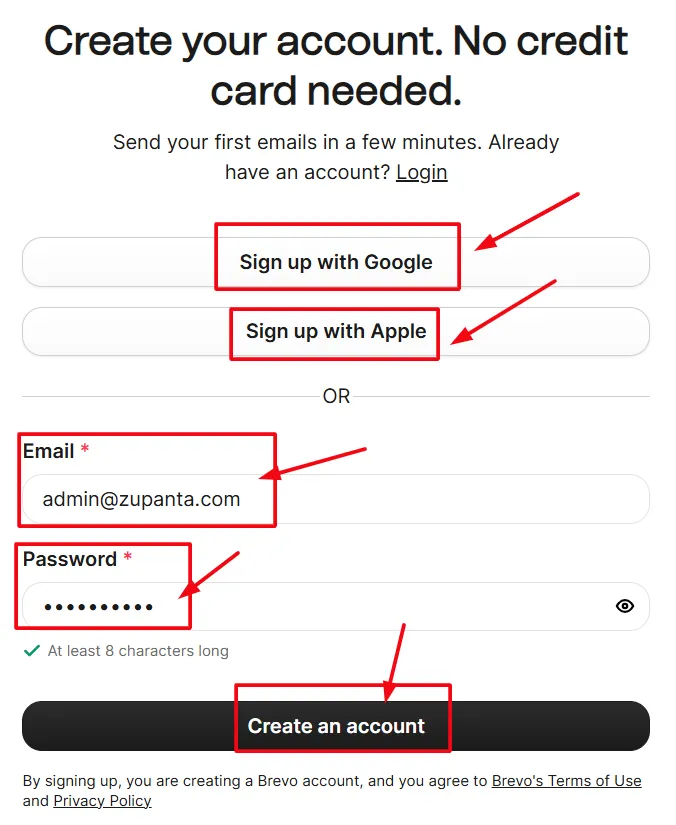
- Gmail (direct signup)
- Apple (direct signup)
- Email (manually enter your email)
You can choose the method that is easiest and most preferable for you. Now, Brevo will verify your email. You will receive a confirmation email from Brevo in your email.
3) Verify Your Email:
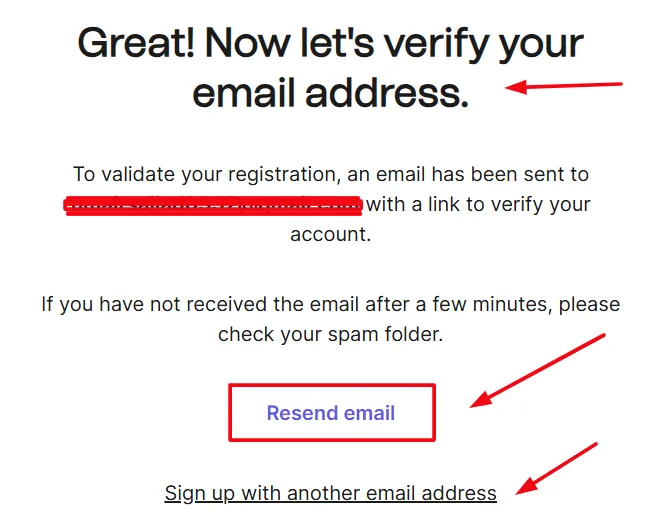
Check your inbox and find the email from Brevo. If you haven’t received the email, then you should check your spam folder as well. Most of the time, Brevo email goes to your spam folder.
Once you find the email, click on the “Confirm my email address” button to verify your email.
4) Fill Out the Registration Form:
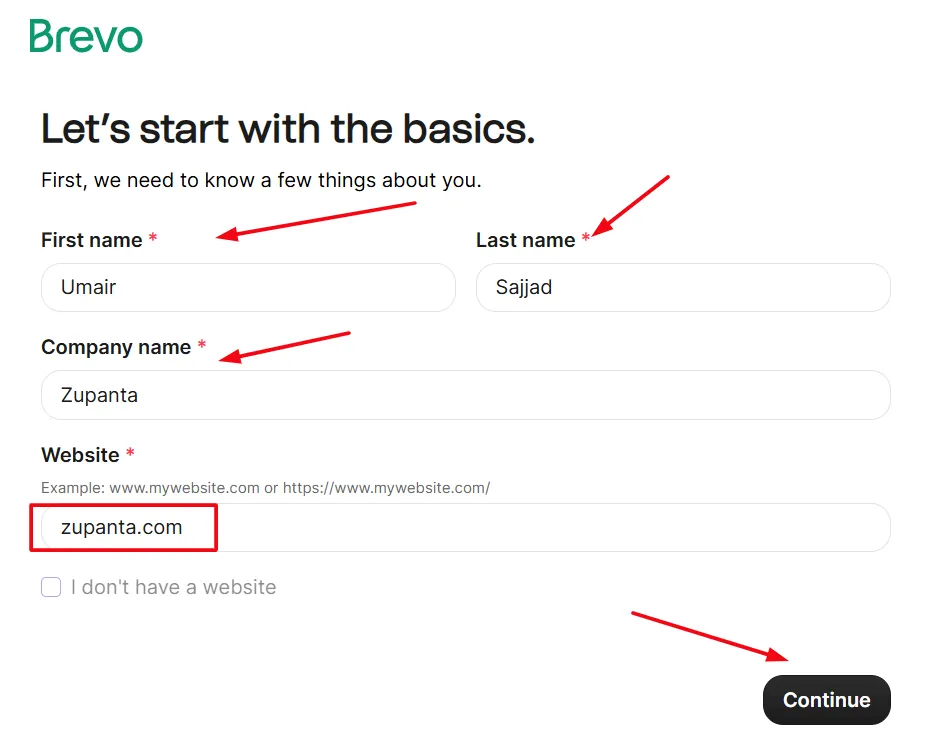
After verifying your email, the next step will be the registration form. You will see the Brevo’s registration form that you need to fill out. Provide your details such as first name, last name, and website address. Now proceed to the next step.
5) Enter Your Company Details:
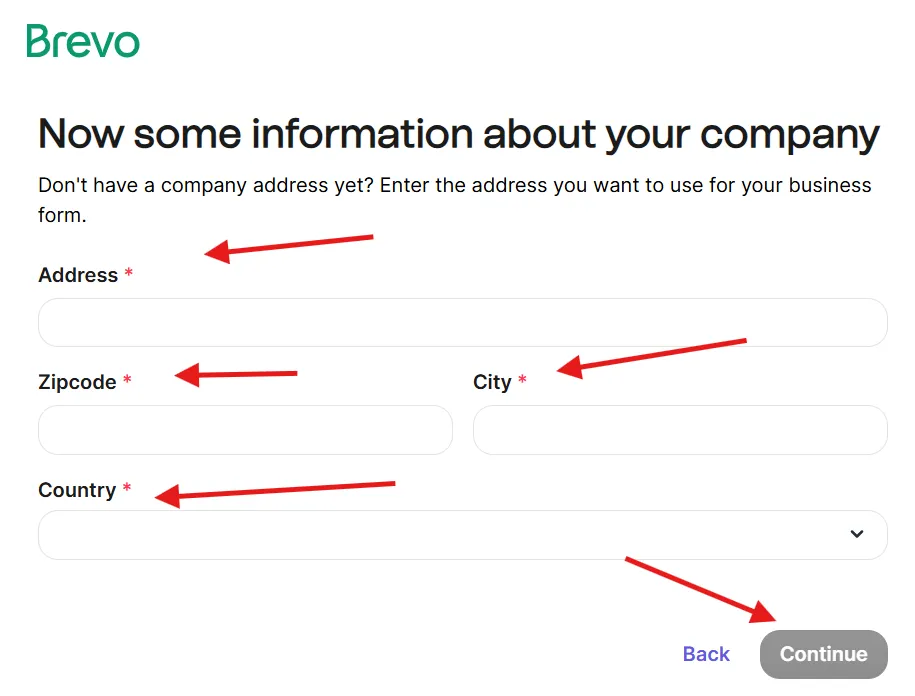
If you are running a company or business, then enter the details of it. You need to enter the complete address, like zip code, postal address, city, and country.
6) Tell About Your Organization:
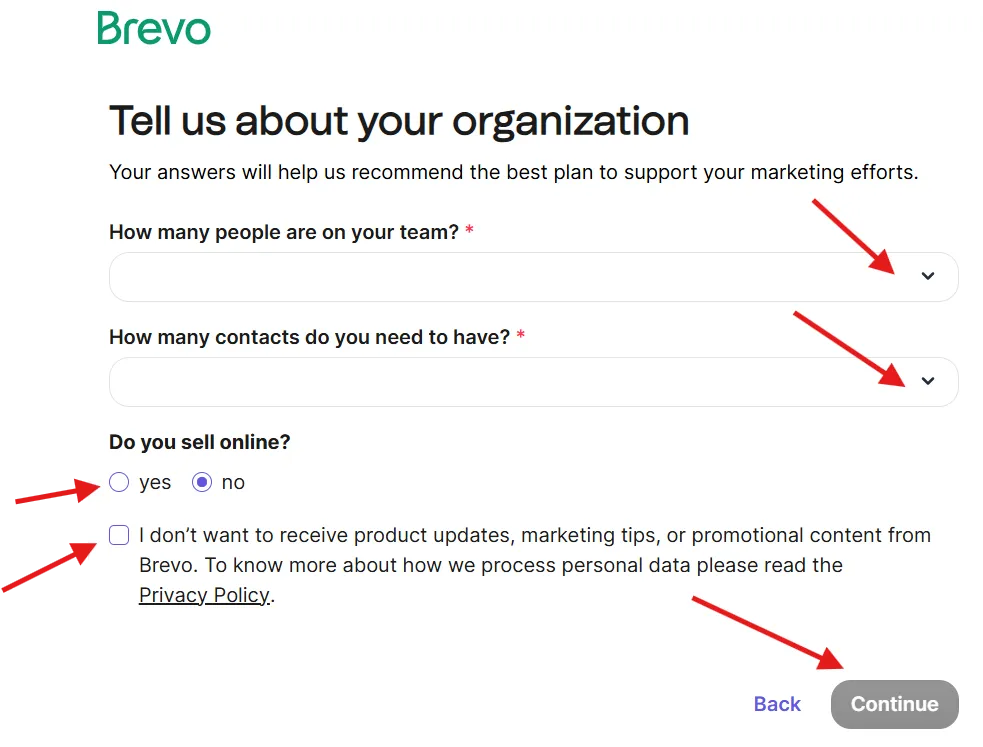
Provide the details about your company or business, such as:
- How many people are on your team?
- How many contacts do you need to have?
- Do you sell online?
- Yes
- No
Submit the details and proceed to the next step.
6) Confirm Your Mobile Number:
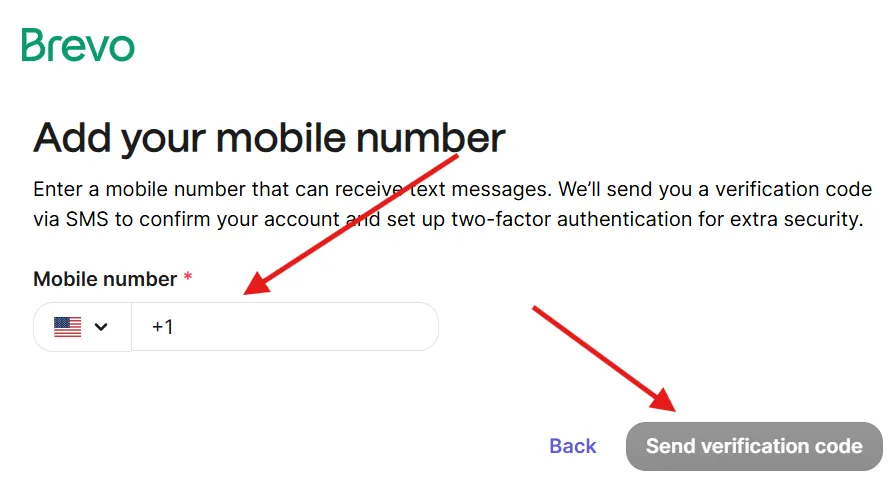
Brevo needs to confirm your phone number with OTP. You have to enter your phone number on the next step and receive an OTP via SMS or phone call. Verify that OTP and confirm your mobile phone number.
7) Choose Brevo Plan:
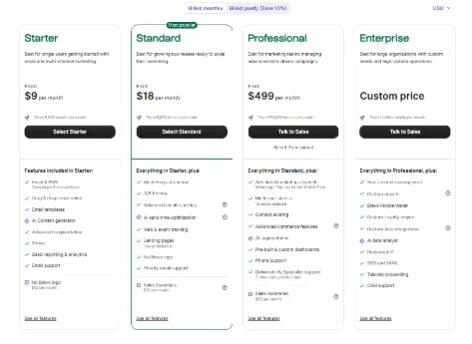
Now you need to choose whether you want to go with a free plan or you need to pay for the “Business” or “Enterprise” plan. If you are not sure where to start, then simply pick up the free plan and start using it with 300 emails per day for free. Learn about Brevo pricing plans in 2026.
8) Complete Your Account Setup:
Now your account registration is complete, and you can start using Brevo. However, you need to add and authenticate your email domain to use Brevo for email marketing and automation.
So this is the complete process of how to register an account with Brevo and start using it for the first time. You can send up to 9000 emails per month with the free plan of Brevo. You don’t need to add any credit card details to get the free plan forever.