
How to get started with MailerLite?
Today, I will share my knowledge about how to get started with the MailerLite tool and what you can do with this amazing email marketing platform.
Getting started with MailerLite is easier than you think. This tool helps you send emails, build campaigns, and grow your audience without stress. You don’t need to be a tech expert. First, you sign up with your email and create an account.
After that, you can start doing magic with this tool. Creating your newsletter, importing a list of subscribers, setting up a landing page, and much more.
What is MailerLite?
MailerLite is a simple yet full-featured email marketing tool that helps business owners of all sizes to improve email marketing. It has features like a drag-and-drop email editor, a user-friendly interface, and a website builder.
Get Started with MailerLite
You need to sign up with MailerLite to start using this platform. I have already written a complete guide on MailerLite sign-up that you can check here.
- Go to the MailerLite website and enter your details:
- Company or Organization
- Email address
- Password
- Now, click on “Create my account”.
- You will be redirected to the next page, where you have to enter your personal details.
An email with a confirmation link will be sent to the email that you need to verify to complete the registration process.
Import Your Subscriber’s List
Before you start any task, you must upload your subscribers’ list to MailerLite’s dashboard. Here are the steps to follow:
Step 1: Open the Subscribers section
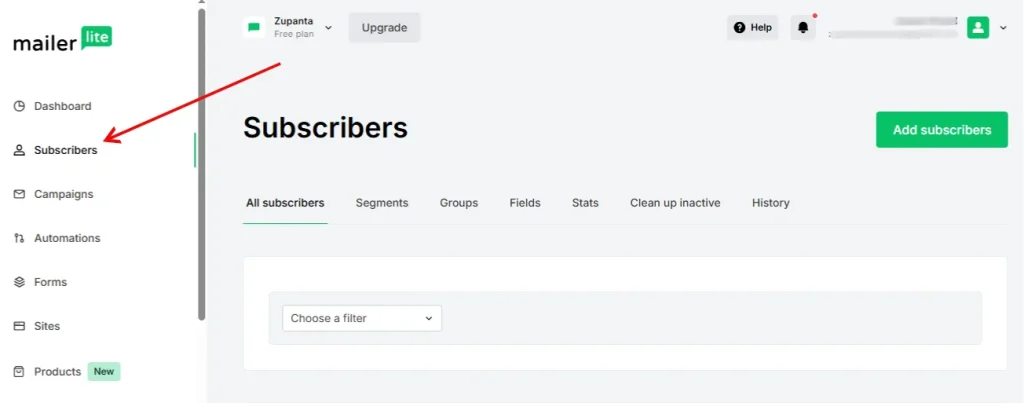
Log in to your MailerLite account. Go to the left menu and click the Subscribers tab. This section shows your list, groups, and growth stats.
Step 2: Start the add process
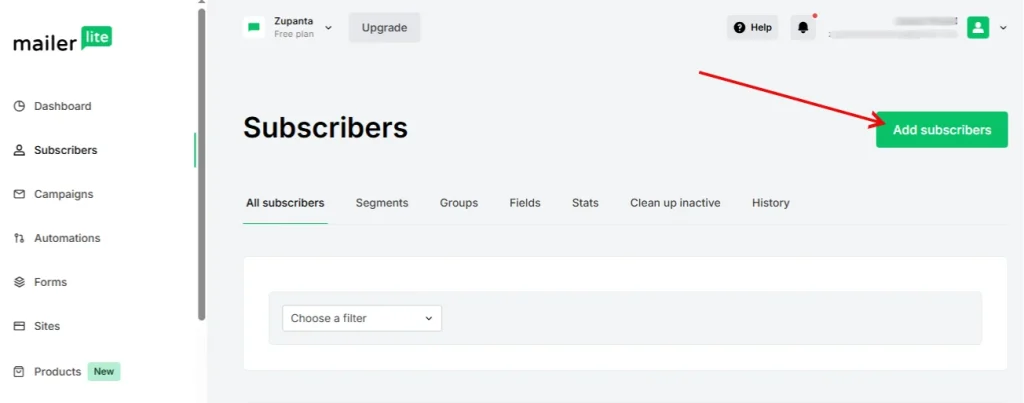
Click the Add subscribers button at the top. This option lets you bring new contacts into your account.
Step 3: Pick your import method

MailerLite gives you several ways to add people:
- Upload a CSV or TXT file
- Paste data directly from a spreadsheet
- Add each person manually
- Move your list from Mailchimp with the built-in import tool
Choose the method that matches your workflow. Confirm your data, save it, and MailerLite will place your new subscribers in your list.
Create Your First Campaign with MailerLite
Creating your first email campaign in MailerLite is the moment when the fun begins. This is the feature most people join the platform for, and the process is easy. You only follow a few steps, and you will have a clean newsletter ready for your audience.
Step 1: Open the Campaigns section
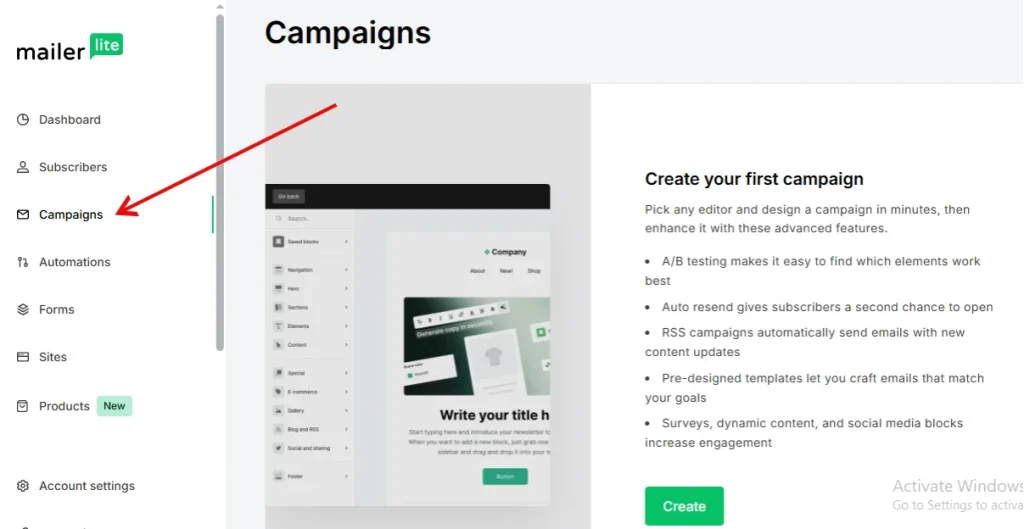
Log in to your MailerLite dashboard. Look at the left side menu and click Campaigns. This page shows all your past and active campaigns.
Step 2: Start a new campaign
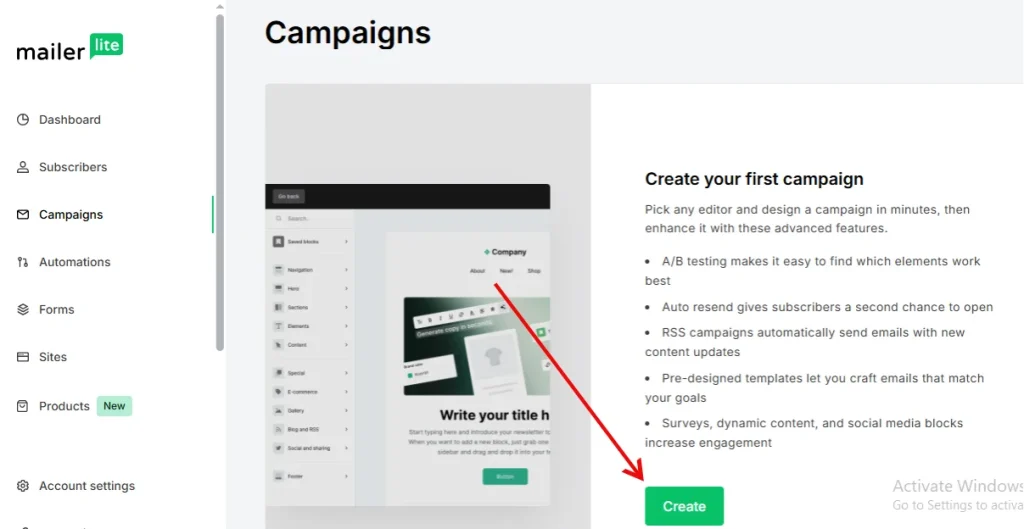
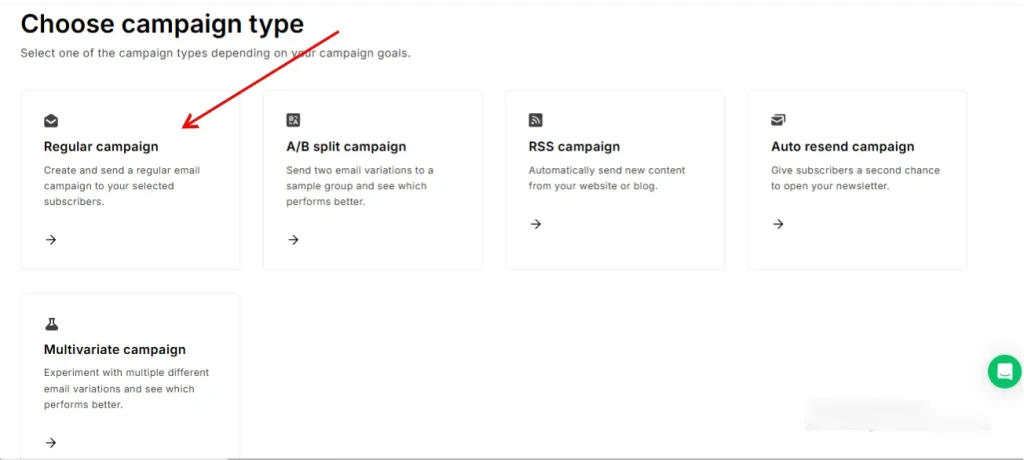
Click the Create campaign button. MailerLite will ask for a campaign name. Use a simple name like “Weekly Tips” or “New Signups.” This name stays internal, so your readers will never see it. Select the campaign type you want to send, such as a regular email.
Step 3: Add the main email details
Now fill in the important parts. Add your subject line, sender name, sender email, and any tracking options you want to use. Keep the subject clear and friendly. Try not to scare people with something like “Open This Now or Else.” After adding the details, move to the next step.
Step 4: Choose your editor
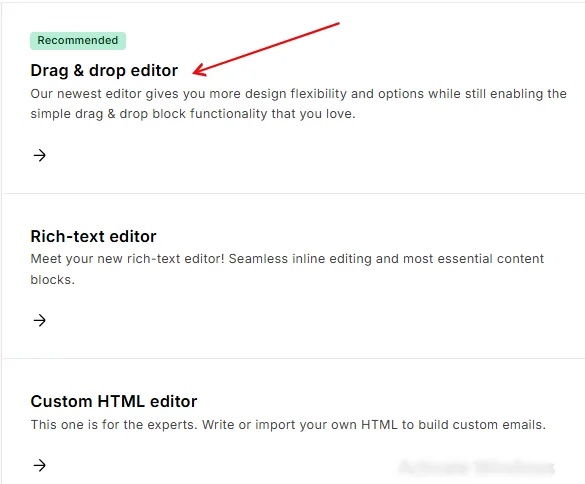
MailerLite gives you different editors. You can use the drag-and-drop builder, the rich text editor, or your own HTML. Most beginners start with the drag-and-drop editor because it feels simple and visual.
Step 5: Design your newsletter
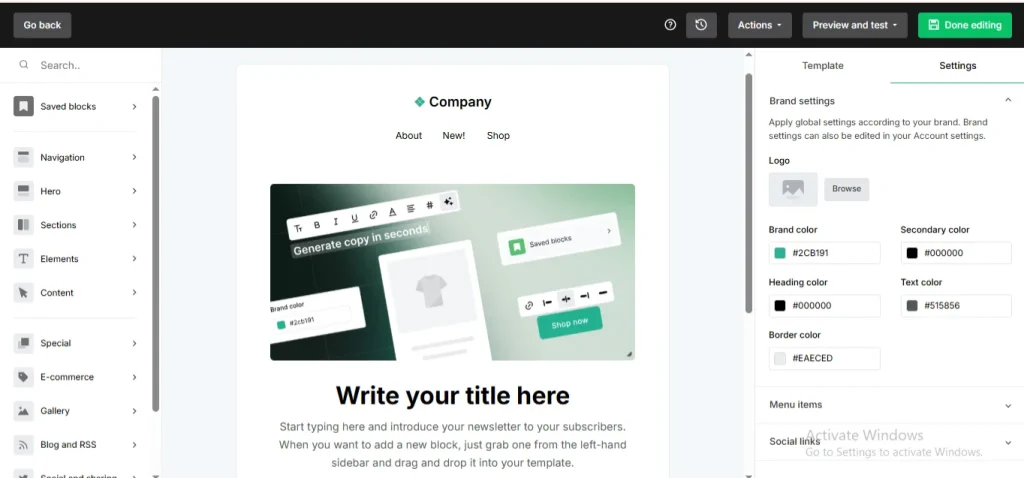
This is where your email comes to life. MailerLite offers more than 50 ready-made templates. Pick one you like, change the text, replace images, and adjust the layout. Keep the design clean. Add clear headings, short lines, and a simple call-to-action.
Try not to add ten buttons in one email. Your reader will feel confused and may run away faster than your WiFi on a bad day.
Create a Landing Page
MailerLite gives you a clean way to build landing pages without stress. You can use it to collect leads, promote a product, or share an offer. The process is simple, even if you are new to landing page tools.
Step 1: Open the Sites section
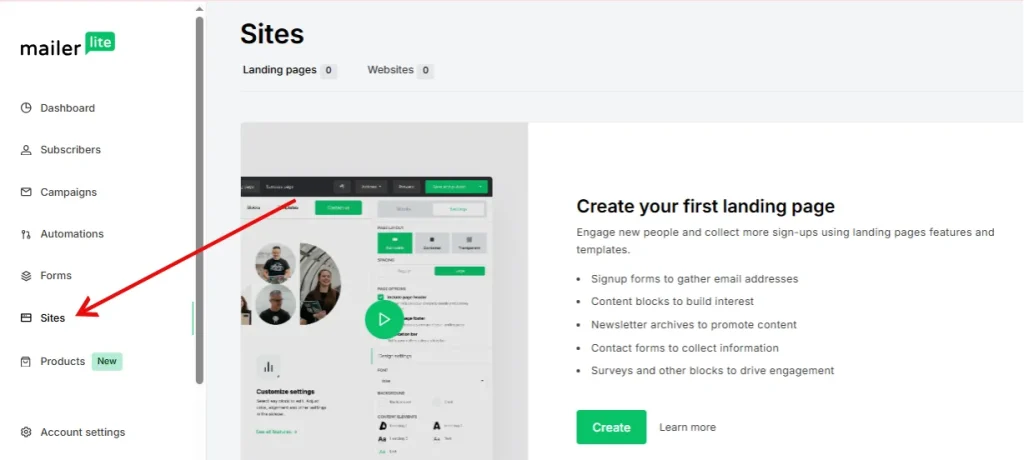
Log in to your account and go to the Sites page from the left menu. This is where all your landing pages and websites stay.
Step 2: Start a new project
Click New site. MailerLite will ask for a name. Use a short and clear name so you can find it later. Save it and move ahead.
Step 3: Select your group
Choose the subscriber group that will receive the leads from this page. This step helps you organize your list.
Step 4: Pick your building method
MailerLite offers two ways to build your page:
- AI Builder: Only for Advanced plan users. The system asks a few simple questions about your goal, audience, and page purpose. It builds a ready-to-publish layout for you.
- Make Your Own: Perfect for Free plan users. You build your page from scratch with drag-and-drop blocks. It’s simple and visual.
Step 5: Final check and publish
Review your page, fix anything you want, and hit Publish. After that, you can track views, clicks, and signups from the dashboard.
F.A.Q
Can I use MailerLite on mobile?
Yes, you can manage your account through any mobile browser.
Does MailerLite let me schedule emails?
Yes, you can set a date and time for your emails before sending them.
Can I segment my subscribers?
Yes, you can divide your list into groups and segments for better targeting.
Does MailerLite support automation?
Yes, you can build automation flows to send emails based on user actions.
Can I track how many people open my emails?
Yes, MailerLite shows open rates, click rates, and other simple stats in the dashboard.