How to Create an Opt-in Form in Flodesk?
Email marketing relies heavily on building a strong subscriber list, and without an effective method to collect emails, your campaigns cannot reach their full potential. An opt-in form is a crucial tool that enables you to gather contact information from your audience, transforming casual visitors into engaged subscribers.
Flodesk provides a simple and intuitive platform to create visually appealing opt-in forms that align with your brand’s style.
With the help of capturing email addresses strategically, you can nurture leads, increase engagement, and drive higher conversions. In this guide, we will learn how to create an opt-in form using Flodesk.
What is Flodesk?

I have been using Flodesk for the last 5 years. Since then, I have achieved great outcomes. Flodesk is an email marketing platform created for small business owners. It provides tools like automation, building newsletters, and opt-in forms.
What Are the Types of Opt-in Forms in Flodesk?
Here are the types of opt-in forms that you can create with Flodesk.
Popup Form: This form appears as a pop-up overlay on your website. It is ideal for grabbing immediate attention from visitors and encouraging them to subscribe without navigating away from the page.
Full-Page Form: A full-page form is a dedicated landing page with its own URL. It is perfect for users who do not have a website or want to create a focused subscription page for campaigns or promotions.
Inline Form: Inline forms are embedded directly within your website content, such as blog posts or pages. They allow visitors to subscribe naturally while consuming your content without any interruptions.
Link in Bio Form: This type of form is for social media platforms, particularly Instagram. You can place a subscription link in your profile bio, directing followers to a Flodesk landing page where they can sign up.
How to Create an Opt-in Form in Flodesk?
Before you start creating your opt-in form, on Flodesk’s free plan, your opt-in form is limited to collecting subscriber information and automatically organizing it into a specific segment that you select within the platform.
1) Create a New Form
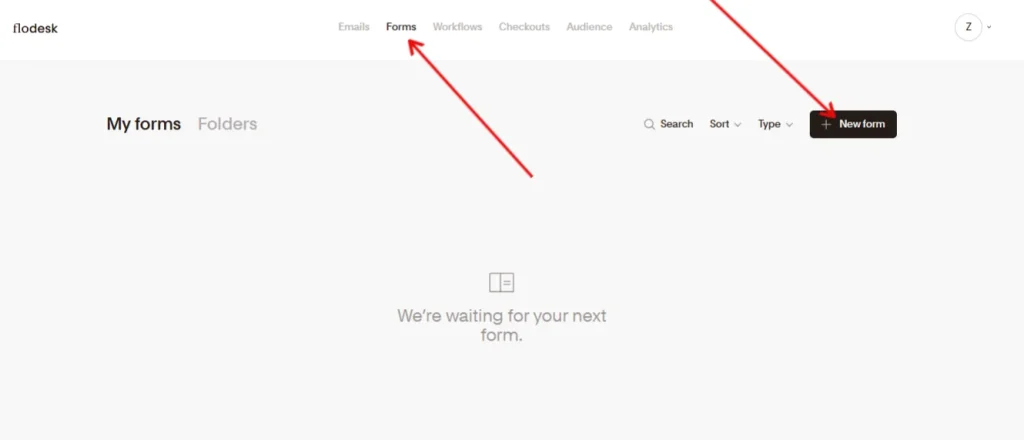
First, you need to create a form in your Flodesk account. For this, navigate to the forms tab. Find the option + New form and click on it to create a new form.
2) Choose Form Type
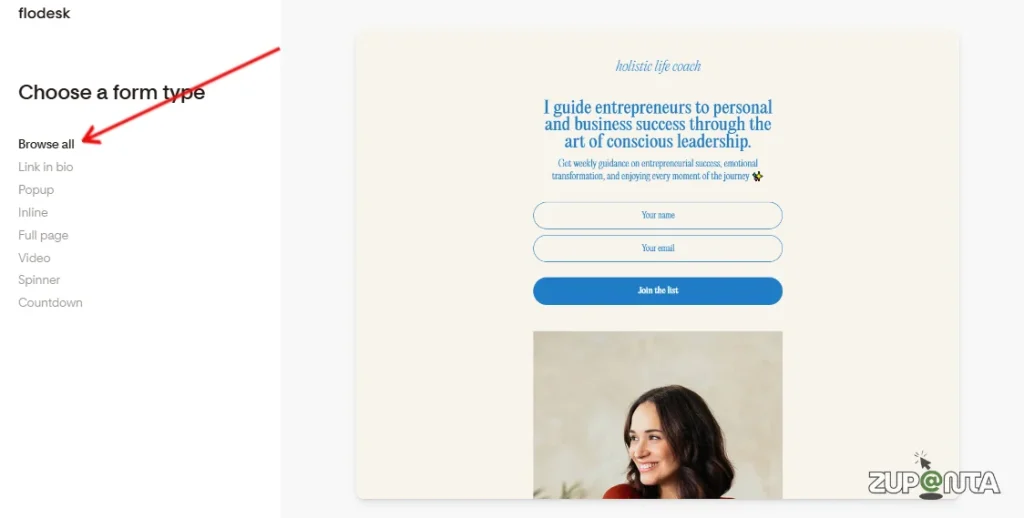
Now you need to pick a form type. You can choose the following types:
- Pop-up
- Full Page
- Inline
- Link-in-Bio
3) Pick a Template
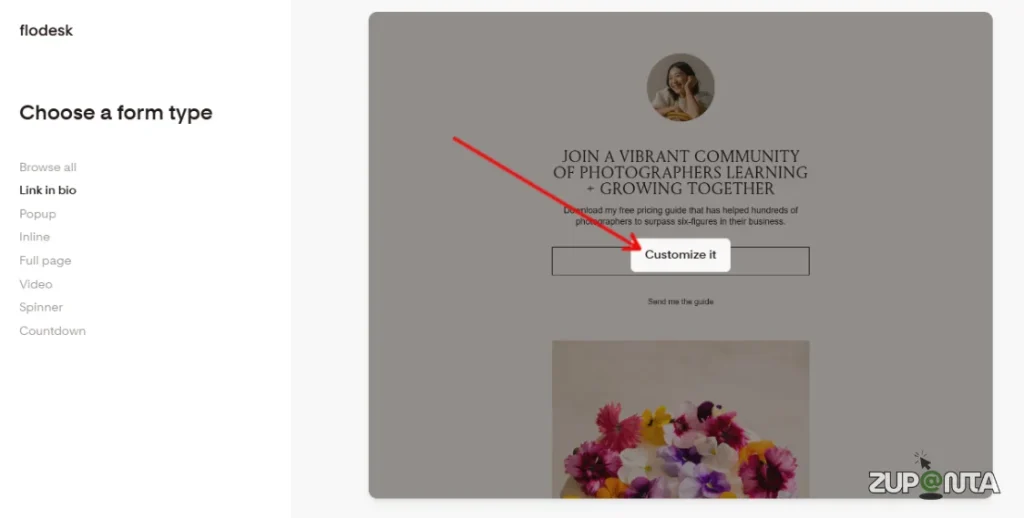
Now you need to pick a template for your form. You can create from scratch or use the templates. Just hover over the available templates and click on the “Customize it” option to get started with it.
4) Create a Segment
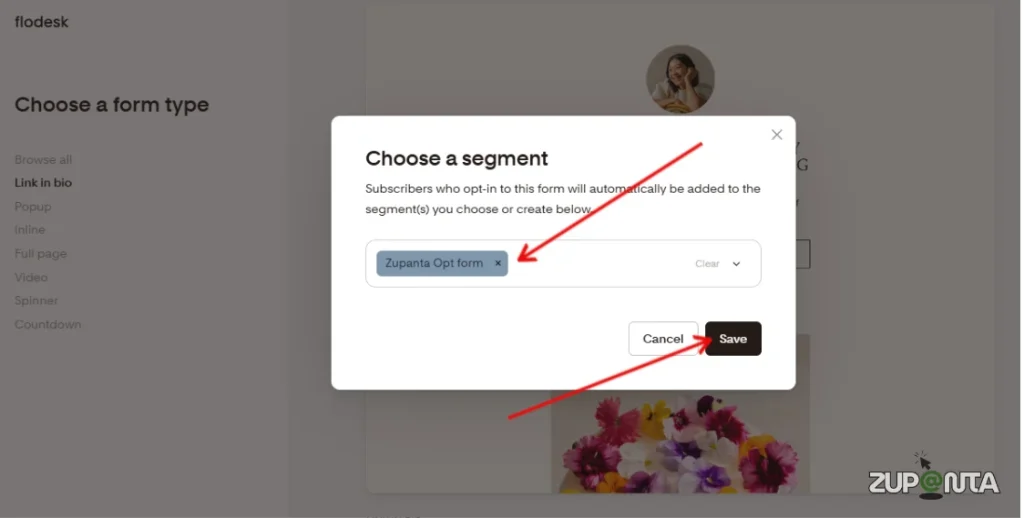
You need to have a database or segment where your subscribers’ data will be stored. You can create using the Flodesk segment creator.
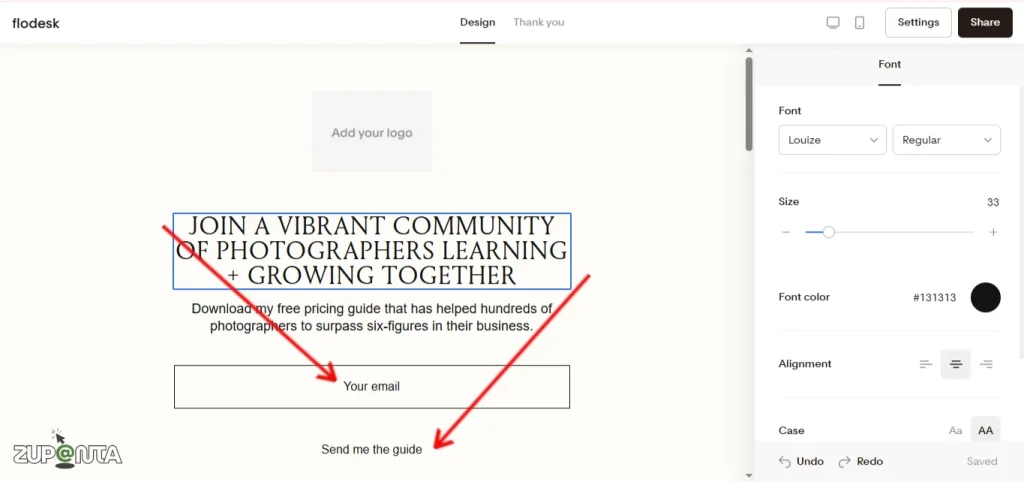
5) Edit or Customize Form Content

Now edit or customize your form content. For this, click on any block like button, images, or text to edit them. You should also add an image to your form. Click on the image placeholder and upload an image that you want to use.
6) Edit Form Fields
You can add new fields or edit the pre-added fields. To add a new field, click on the “+ Add field” button to add a field.
7) Optimize for Mobile Screens
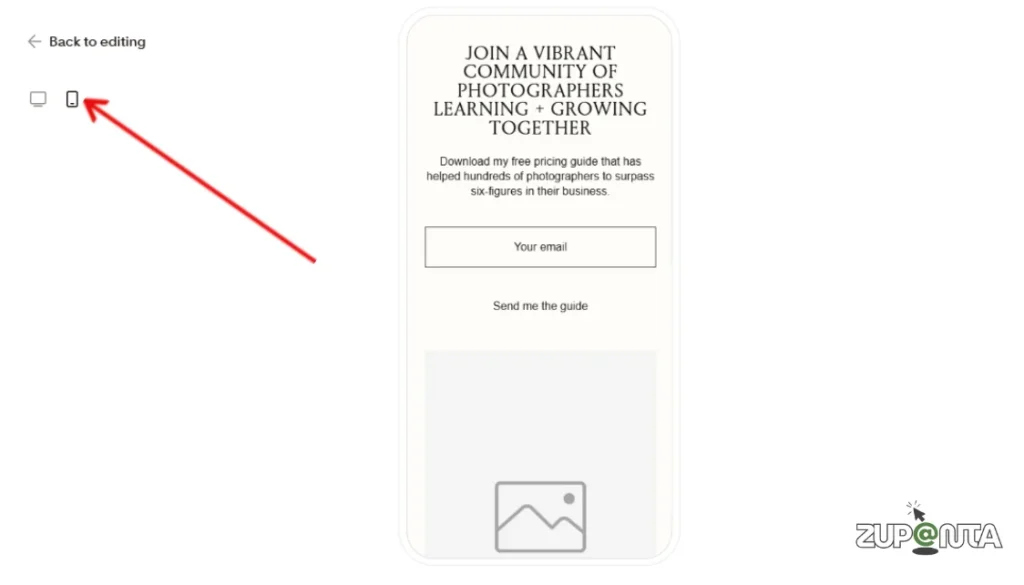
80% of the users on the internet are using mobile devices to browse the internet. So you should prioritize mobile display optimization.
Don’t worry, you don’t need to place a bunch of code here. Just click on the “Image on mobile” option, and you are all set to go.
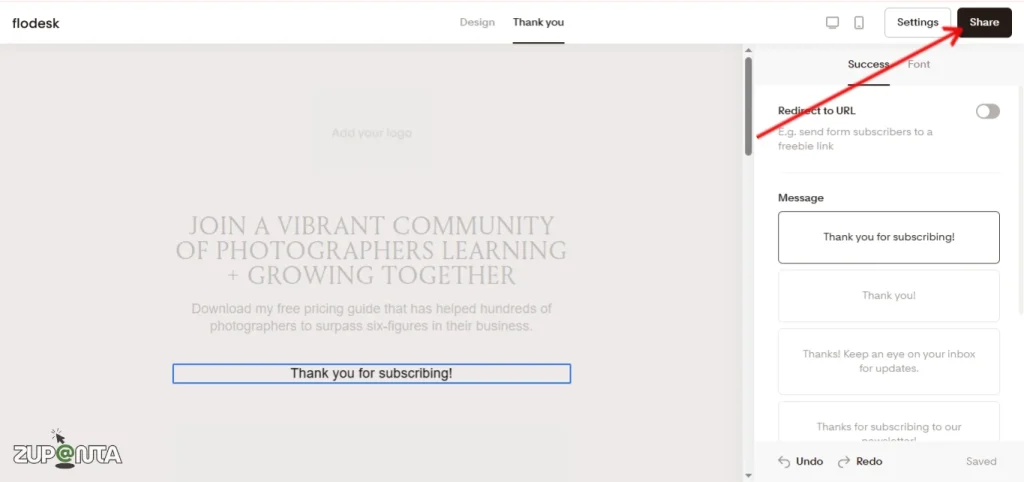
8) Set Your Thank You Message
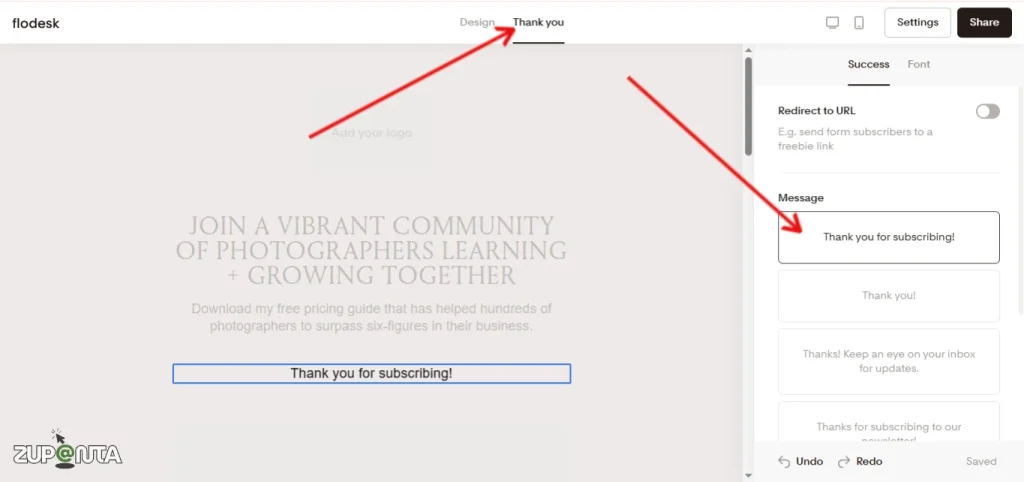
After a subscriber submits the form, it is important to acknowledge their action with a thank-you message. Flodesk allows you to create a custom message that appears immediately after the submission.
You can personalize it with text, images, or even links to your website or social media pages. This not only confirms that the subscription was successful but also encourages further engagement, such as visiting your content, downloading a resource, or following your social accounts.
9) Publish Your Form
Once your form is designed, customized, and optimized, it is time to publish it. Click the “Publish” button in Flodesk to make your form live. Depending on the form type, you will get a URL for full-page or link-in-bio forms, or embed code for inline forms on your website.
For pop-ups, Flodesk provides the code snippet to add to your website, ensuring the form displays correctly. After publishing, your form is ready to start collecting subscriber information and growing your email list.
10) Embed Your Form
The last thing is to embed or share your form with your audience. All you need to do is go to the embed tab and copy the HTML code of your form, and paste it on your website; that’s it.
Conclusion
Flodesk allows users to create opt-in forms quickly and effectively. Users can select from Popup, Inline, Full-Page, or Link-in-Bio forms. Each form can be customized for design, fields, and the thank-you message.
Subscribers are stored in specific segments to simplify email list management and support automated campaigns. Users can embed the form on a website or share it via a direct link, depending on the form type.
Flodesk ensures that subscriber collection and organization are straightforward. This process supports efficient email list growth and improves campaign management.