Send Your First Flodesk Email
Are you ready to send your first Flodesk email? Are you new to Flodesk? If your answer is a big yes for both questions, then keep reading.
My name is Umair Sajjad, and I have been doing SEO and email marketing since 2015. I have used Flodesk numerous times to send emails to my customers.
With my experience, I have written this post to help my brothers and sisters who need to use this tool.
Now you can get complete information on how to send your first email using Flodesk. Let’s start it without wasting any time.
What Will You Need to Send Your First Email from Flodesk?
Don’t panic! You don’t need much to start your journey. Here are a few things you need to keep prepared for.
- ESP (Email Service Provider): First of all, you need to have an ESP to send an email to millions of people at the same time. Flodesk is your ESP in this case.
- Email Address: This will be your email that your subscribers will see when they open the email. This will be the same email where you get replies and queries from your subscribers. This email will look like “umair@zupanta.com”.
- Email List of Subscribers: This will be your email addresses where you need to send emails. These will be your subscribers.
- Email Signup Form: This will be a form where your new subscribers add their emails to join your list.
- Email Template: You can use Flodesk’s built-in email templates.
Now sign up for Flodesk if you don’t have an account. I have a dedicated page on “How to create a Flodesk Account” where you can learn about how to register with Flodesk.
If you already have an account, then log in to your account and proceed to the next steps.
Also Read: Flodesk Review 2026
Send Your First Flodesk Email – Step-by-Step Guide
Here we go!
Step 1. Add Your Opted-In Subscribers Using a CSV File
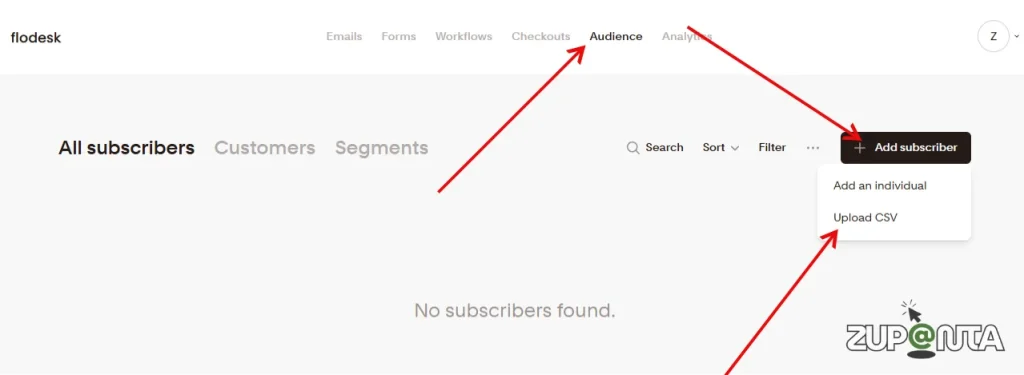
You need to have a list of recipients to whom you can send your emails. For this purpose, your first step is to upload a CSV file of subscribers’ email addresses. However, if you are new to email marketing and do not have any subscribers yet, then proceed to the next step.
Step 2. Build an Opt-in Form

If you don’t have a subscribers’ list, then you have to create an email sign-up form.
- Choose a segment where you want to send or add your email newsletter sign-up subscribers. Create a segment by following these steps:
- Go to Audience dashboard > Segments.
- Click on the “Create + New” segment.
- Give it a name like “Email Newsletter Sign-Up”.
- Now your segment is ready, and you can add new subscribers here.
Step 3. Create Your First Email and Send It
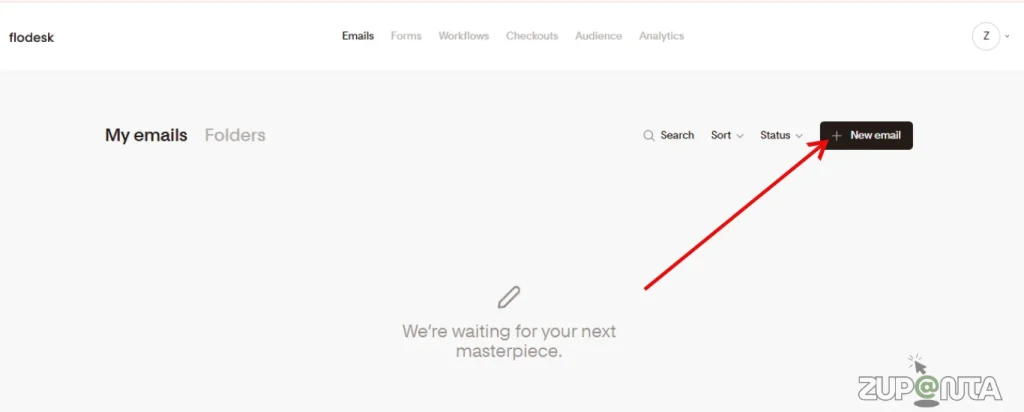
This is the last step where you need to write, customize, and design your email. You can use the built-in email newsletter templates of Flodesk.
Logo Block
Start with the logo block. Choose a logo for your email. You can choose or design your own brand’s logo. This is an important step as it will make your email look professional.
Layout Blocks
Layout blocks help you control the structure of your email. You can arrange content in columns or sections. Flodesk uses its own design system, so everything looks clean. You can mix text, images, and buttons while keeping a professional and balanced layout.
Text Blocks
Text blocks let you add written content to your email. You can write headings, paragraphs, or short messages. Change font style, size, and color easily. Keep your text clear and short so readers can understand your message fast and take action.
Image Block
The image block helps you add visuals to your email. You can upload images or choose from your computer. Images make emails more engaging. Use them to show products, promotions, or brand visuals. Always use clear and high-quality images for a better impact.
Video Block
The video block allows you to add videos to your email. You can embed videos using a link. Videos help explain ideas faster than text. They increase engagement and clicks. Use short videos to share updates, tutorials, or special announcements with subscribers.
Button Block
The button block helps you add a clear call to action. You can link it to a website, product, or form. Change button color, text, and size. A strong button guides readers and improves clicks. Use simple words like “Read More” or “Shop Now”.
Link Bar Block
The link bar block lets you add multiple links in one row. You can link to pages like Home, Blog, or Contact. It works well for navigation. This block helps readers explore your website easily without cluttering the email design.
Now you are ready to send your first Flodesk email. Review your email once before sending. Check text, images, links, and buttons. Make sure everything looks clean and clear. Select the correct segment or subscriber list.
Set a strong subject line that grabs attention. Preview your email on desktop and mobile. This step helps you avoid mistakes. When everything looks good, click the send button. Flodesk will deliver your email to your subscribers.
Congratulations, you have successfully sent your first email. This is the start of your email marketing journey.