

How to Create a Brevo Email Signup Form?
Email marketing is incomplete without a signup form. You need to have an appealing and compelling email signup form to increase your email list. Brevo provides this tool to make signup forms and integrate with your website or app in a user-friendly way.
This guide will let you know how to create an email signup form with Brevo. The guide is simple and easy to follow. You only need a Brevo account, and that’s it.
What Are the Must-Haves of a Perfect Email Signup Form?
A great form does not feel heavy. It feels friendly. It invites action. Here are the must-have elements:
- Clear Headline: Use a short title. Say what you offer. Example: “Join for Free Email Tips.”
- Short Form Fields: Ask for less info. Ask for name and email only.
- Strong Call-to-Action Button: Use clear action words. Examples:
- “Subscribe”
- “Join Free”
- “Get Emails”
- Benefit Message: Tell users what they will get. Example: “Get tips, updates, and deals in your inbox.”
- Clean Design: Use a neat layout. Avoid heavy colors. Keep focus on the form.
How to Create a Brevo Email Signup Form?
Now, let’s find out how you can create your perfect email signup form with Brevo. Follow these steps.
1) Log in to Your Brevo Account:
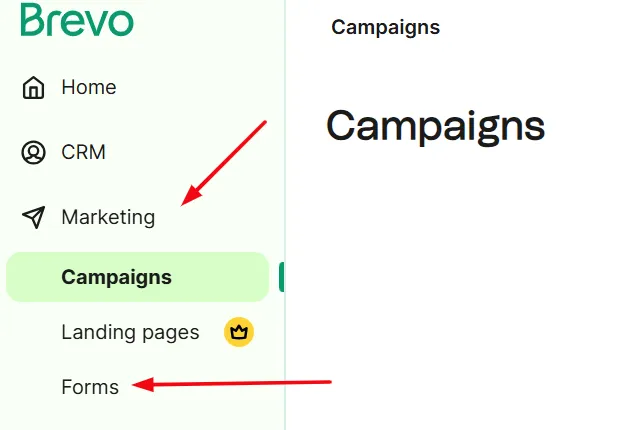
Log in to your Brevo account and go to “Marketing” in the left sidebar and then choose “Forms”.
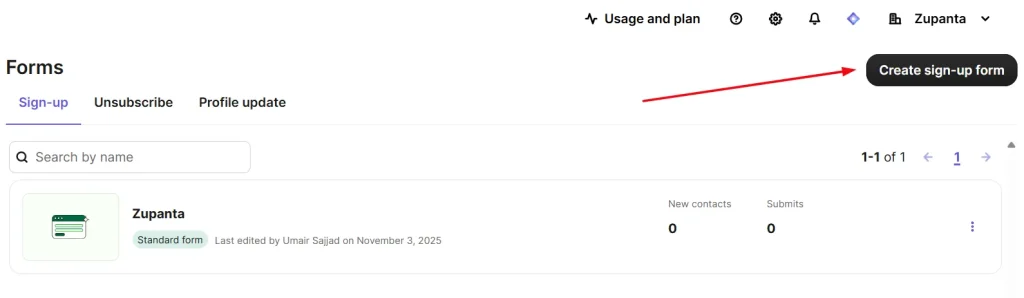
On the next page, you need to click on the “Create Sign-up form” button.
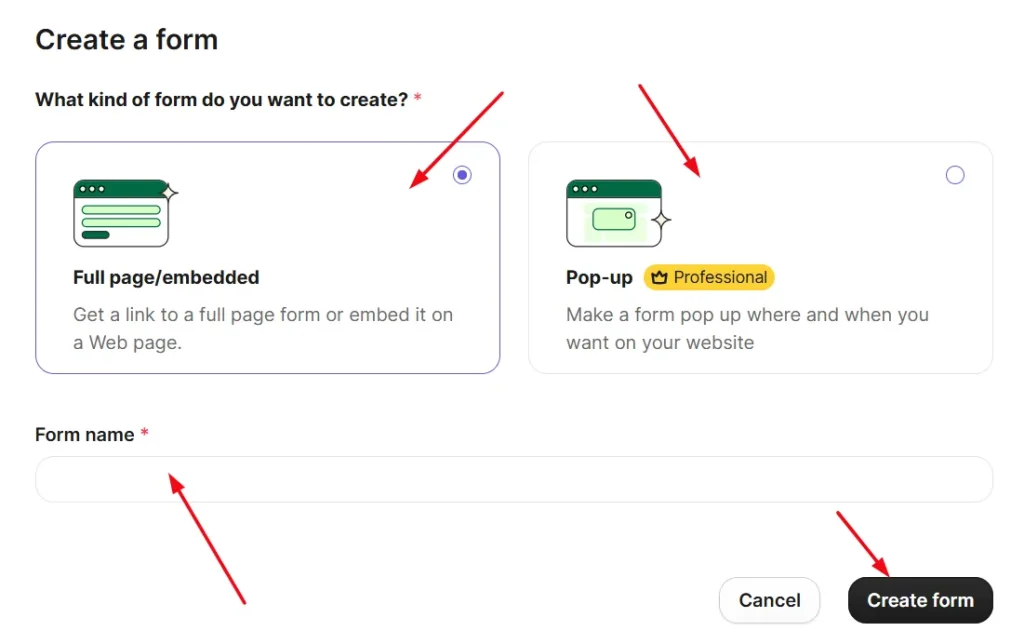
A dialogue will open, and you need to choose between “Full page/ embedded” or “pop-up”. However, for free users, you can only go with the first option, while the second option is only for Professional plan subscribers.
2) Design & Customize Your Form
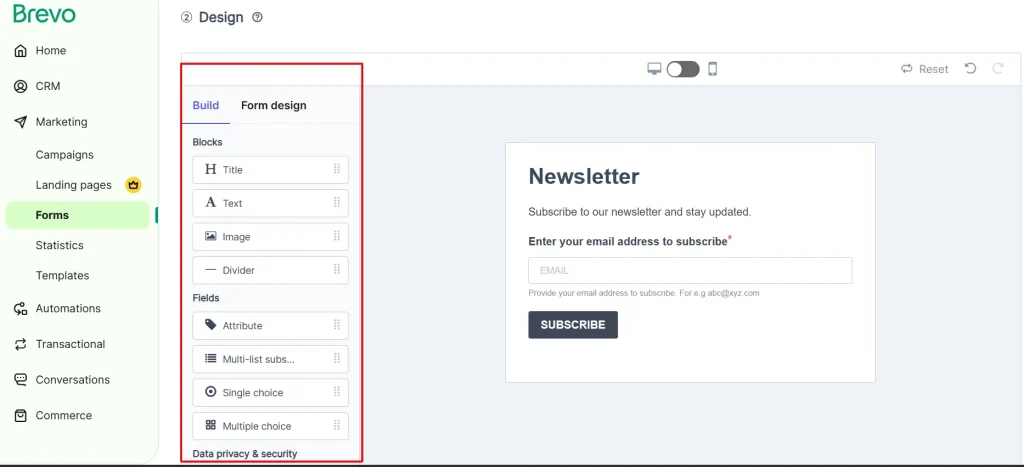
On the next step, you need to design your signup form just the way you like it. You can customize it like edit the text, change the font styles and colors, and much more. You can create a design according to your brand theme as well.
However, keep things simple and clean. Keep the buttons’ text bold and bigger to make it appealing and attractive.
3) Add Your CTA Button and Content
Here you can add your CTA or call-to-action button for your subscribers. Write simply and clearly, and keep everything clean. Position the button where all the users can see it easily.
Write a short line that explains the value. Example: “Join for the latest email marketing tips.” Keep your tone friendly and straightforward. Use active language that pushes action.
Here are some of the examples of best CTA button texts.
- “Join Now”
- “Get Updates”
- “Sign Up Free”
Avoid long lines or confusing words. Keep your CTA message easy to understand.
A clear button and simple text help more people click with confidence.
4) Create Your Form Input Fields:
Now choose the input fields for your form. Add only the fields that you need. This keeps the form clean, simple, and easy to fill out.
The email address is the field that you should keep at the top. This is required. However, other fields like Name, phone number, and Date of Birth are also collected if needed. Keep your field count low. Long forms push people away. Short forms invite action and more signups. A clean and simple form builds trust and comfort for users.
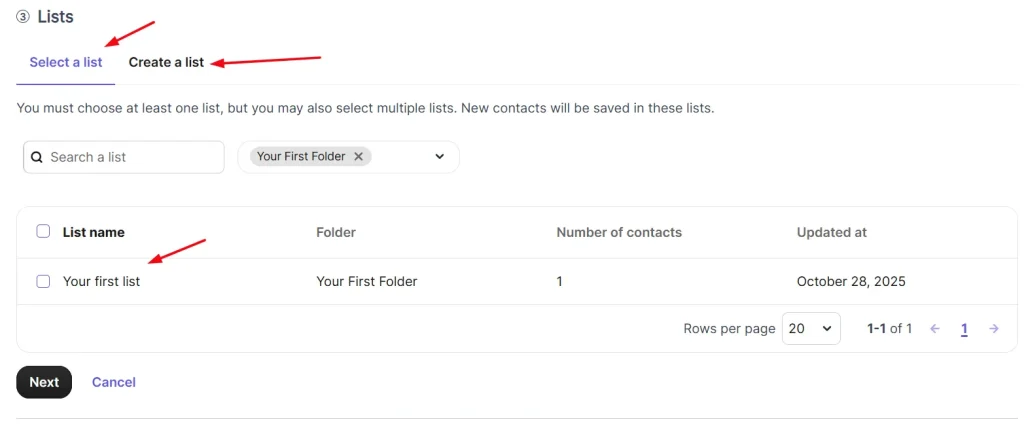
5) Choose or Create a New Contact List:
The next step is to either choose an existing contact list or create a new one for your new subscribers to add to. Just click on the “Create a list” button to create a new list for your new subscribers.
6) Create A Confirmation Email for Subscribers:
Confirmation of the subscriber’s email is very necessary. This will let you collect only the real members. You can not leave this step as people can submit fake or wrong emails, which will not be good for your email marketing.
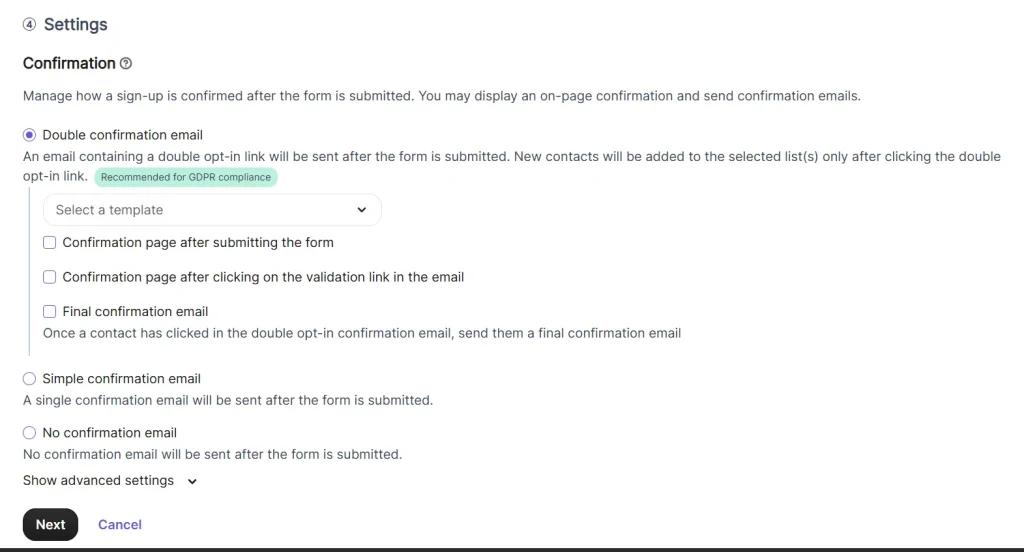
7) Approve the Signup with Confirmation Email:
On this stage, the user has already submitted the details and form. Now you should set an auto confirmation email to send as confirmation. This is a very important step, as the users should be aware that their signup process is successful.
8) Add Signup Form To Your Website or App:
Now add your signup form to your site or app. Copy the embed code from Brevo. Paste it into your website where you want the form to appear. You can place it in a sidebar, footer, blog post, landing page, or pop-up area.
Make sure the form is easy to see. Test it on desktop and mobile. Check if the button works and if emails go to your list. A visible and working form helps you collect more subscribers without effort.
If you use WordPress, you can insert the code inside a block or widget. If you use another platform, add the code in your HTML section. Keep the form in a place where users naturally look for updates or signup options. This increases signups fast and keeps your user flow smooth.